How to Test a Continuous Chlorination System on a Private Well
Test a private-well continuous chlorination system with measured flow, pump output, contact time, free chlorine, and a safe homeowner decision log.
The short answer
Verify the system’s approved design target and chemical label first. Then record water flow, measure the pump’s actual solution output using its manufacturer-approved calibration method, estimate contact time from usable volume and flow, and test free chlorine after contact at the farthest practical tap. A missing residual, empty tank, failed pump, positive bacteria result, or unknown target is a stop-drinking-and-escalate condition—not a reason to adjust settings blindly.How to Test a Continuous Chlorination System on a Private Well
The safest homeowner test is a record, not a smell test: identify the system’s approved design target and chemical label, measure actual household water flow, verify the metering pump’s solution output using the pump maker’s approved calibration method, document the usable contact volume and time, then test free chlorine after contact at the farthest practical sample point. If the tank is empty, the pump has failed, the residual is missing or below the approved target, the target is unknown, or a bacteria result is positive, stop treating the water as verified and use a safe alternate drinking source while you arrange qualified help and laboratory follow-up.
This protocol is model-agnostic. It helps you collect evidence without telling you to turn a dial until the water smells right. A continuous chlorination system can be flow-proportional, fixed-rate, pulse-driven, or timed. The correct output depends on the equipment, chlorine product, water chemistry, design flow, contact stage, and the target written for that installation. A number from another home, another pump, or a generic internet table is not a substitute for your system’s approved design.
1. Set the safety boundary before testing
Private-well owners are responsible for knowing whether their water is safe. The CDC’s private-well testing guidance explains that public-water rules do not regulate, treat, or monitor a privately owned well. If testing shows harmful germs or chemicals, CDC advises using bottled water or another safe source until the water has been treated and tested. A chlorine test can tell you about one operating condition; it cannot clear a well for every possible contaminant.
Use a safe alternate source for drinking, cooking, ice, brushing teeth, and infant formula when any of these conditions apply:
- A certified-laboratory result reports E. coli, fecal contamination, or another harmful contaminant, or your health department has issued a use restriction.
- The chlorination system has no known design target, its chemical container is empty, the pump is alarmed or not operating, or the injection line has visibly leaked.
- A valid free-chlorine test taken after the contact stage shows no measurable residual or is below the installation’s approved minimum.
- The test kit is expired, the sample point is before contact, the water was not flushed, or you cannot tell whether the result is free chlorine rather than total chlorine.
- A recent well, pump, pressure-tank, plumbing, or treatment-system repair was followed by a bacteria concern or unusual water change.
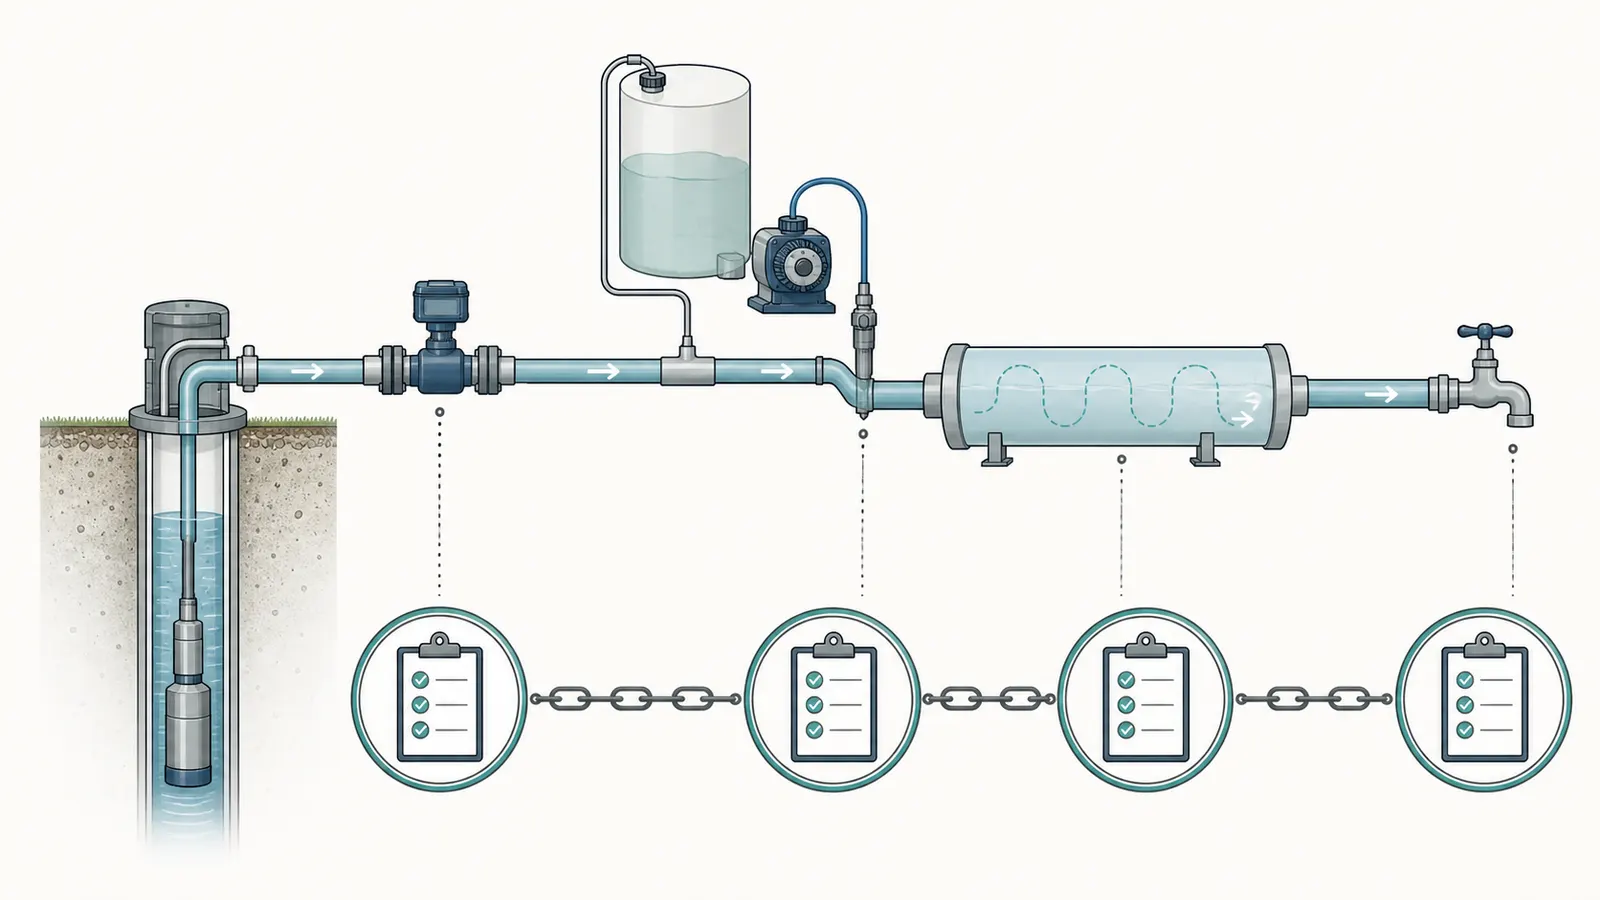
This is a conservative household decision boundary, not a claim that every low residual is a legal violation. The purpose is to avoid treating an unverified system as safe while you find the cause. Ask your local or state health department how a positive result, advisory, or required follow-up applies where you live.
Do not open a well, remove a well cap, pull a pump, enter a tank or other confined space, open an energized control enclosure, test live wiring, disconnect a pressurized chemical line, or manipulate a pressurized vessel. Do not mix chlorine and acid. Virginia Tech Extension warns that acid and chlorine should never be combined in one container because dangerous chlorine gas can be released; its guidance also describes chemical and biological plugging mechanisms that can make an injection path look like a dosing problem. Leave electrical, pressurized, confined-space, wellhead, and chemical-line work to a qualified water-treatment or well professional.
The New Jersey Department of Environmental Protection’s private-well treatment guidance is especially clear that shock chlorination should be performed by a private-well professional, not the homeowner. That is a state agency recommendation, not a nationwide rule, but it is a sensible high-safety boundary for any job that involves opening the well or handling a high-strength shock treatment.
2. Gather the system record before touching settings
Find the following documents and write down what they say. Take photographs of labels and indicator lights only from a safe position; do not remove covers.
| Record | What to capture | Why it matters |
|---|---|---|
| Design target | Required free-chlorine residual, target flow, contact volume or contact-time basis, and any pH or temperature assumptions | This is the comparison standard. If it is missing, pause and ask the installer, designer, health department, or manufacturer. |
| Chemical product | Exact product name, active ingredient and strength, label directions, lot or purchase date, and whether it was diluted | A pump setting is not a dose until the solution strength is known. |
| Pump control | Brand, model, control mode, water-meter or flow-switch signal, setting, alarms, tube-change date, and manual | A flow-proportional pump and a timed pump fail differently. |
| Water path | Injection point, filter locations, contact tank or contact piping, first tap after contact, and farthest practical tap | A pre-contact sample cannot verify post-contact residual. |
| Water quality | Latest total-coliform/E. coli report, pH, iron, manganese, hydrogen sulfide, ammonia if tested, turbidity, and any recent change | Demand and water quality can consume chlorine before it reaches the sample point. |
Do not copy a target from a pool, municipal system, or another well. As an educational example, University of Missouri Extension describes simple chlorination as maintaining 0.3–0.5 mg/L of free residual for at least 30 minutes and measuring at the faucet most distant from chlorine addition. The same publication gives different residuals for different pH, temperature, and contact times. That example is useful for understanding the variables; it is not a universal US private-well requirement and does not override your treatment design or chemical label.
Confirm the sampling point. You want the first practical tap after the final contact tank or contact piping for a post-contact check, and usually the farthest practical tap as a distribution check. If the only accessible tap is before contact, label that result “pre-contact” and do not use it as the pass/fail residual. The Minnesota Department of Health’s continuous-groundwater measurement guide is written for regulated noncommunity systems, but its sampling-quality advice is useful here: old water can rapidly lose residual, so flush the tap for at least one minute and sample during a representative or peak-use condition.
3. Measure household flow and chemical-feed output
The first question is whether the system is receiving and responding to the water flow it was designed around. A flow-proportional pump may respond to a meter pulse; a timed pump may run for a scheduled interval regardless of the faucet flow. Stenner’s S128 product page shows one product-specific example: a dry-contact pulse water meter activates the pump, and the pump changes speed across flow ranges. Other pumps do not necessarily work this way.
Measure a repeatable water flow
Use a faucet or drain point that is safe to operate and downstream of the well pump. Do not defeat a pressure switch or leave a hose discharging where it can flood a building. Use a container with a known volume and a stopwatch or phone timer.
- Record the faucet location, pressure reading if already displayed, and whether other fixtures are closed.
- Let the faucet run until the flow is steady. Collect a known volume, such as the marked volume on a clean container, and time the collection.
- Calculate the observed flow:
gallons per minute = gallons collected ÷ minutes elapsed. For a 2-gallon container collected in 24 seconds, the screening estimate is2 ÷ (24 ÷ 60) = 5 gpm. - Repeat twice. Record all readings, not just the most convenient one. If the readings vary materially, record the range and have the professional check the meter, pressure behavior, restrictions, or well yield.
- Repeat at a representative high-use condition if your design target is based on peak flow. A small bathroom-faucet flow is not proof that the system doses correctly when a tub, washer, or irrigation demand opens.
This is a homeowner observation, not a certified flow test. Do not infer well capacity, pump horsepower, or pressure-switch settings from a bucket test. The useful output is a repeatable flow number to compare with the design paperwork and with the pump’s signal behavior.
Verify pump response without opening the pump
Watch the pump only from the outside while a safe flow is running. Record whether the expected power, pulse, run, low-level, leak, fault, or overrun indicators respond. If the pump is supposed to be flow-proportional, record whether it receives a meter or flow-switch signal. If the pump is timed, record the on/off schedule and the exact time it ran during the flow test.
An empty solution tank, a low-level warning, a leak alarm, a fault light, a silent pump, or a pump running when the system has no flow is evidence of a feed/control problem. It is not evidence that the chlorine concentration is merely “a little low.” Stop at the external observation and call the installer or service professional if the manual does not provide a safe homeowner check.
Measure actual solution output only by an approved method
A pump dial, a nominal ratio, or a manufacturer chart is not the same as measured output. Stenner says the S128 output chart is approximate under controlled conditions and recommends field calibration by analytical testing to confirm actual output. That is why this record separates “setting” from “measured output.”
If your manual explicitly provides a safe calibration or prime procedure, follow that procedure exactly. It may specify a collection time, a graduated vessel, a test mode, tubing condition, back-pressure, and how to return the pump to service. Use the chemical product label’s protective equipment and handling directions, keep the area ventilated, and collect only into a compatible marked vessel. Never place your hands near moving parts, remove an energized cover, disconnect tubing under pressure, or improvise a prime path.
If the manual does not provide a homeowner calibration procedure, record “not homeowner-testable” and have a qualified professional measure the output. Bring the pump model, solution strength, observed flow, control mode, and target to that appointment. A professional may measure volume over time or use an analytical method; the method must match the pump and solution.
For a safe record, capture:
| Pump-output field | Entry |
|---|---|
| Pump model and tube/service-kit age | ______________________________ |
| Control mode: flow-proportional / fixed-rate / timed / unknown | ______________________________ |
| Solution strength and dilution | ______________________________ |
| Approved calibration method followed? | yes / no / professional |
| Collection time and measured output | ______________________________ |
| Pressure or operating condition, if the manual requires it | ______________________________ |
| Alarm or indicator observed | ______________________________ |
If the measured output is zero or materially different from the design record, do not compensate by increasing the setting blindly. The fault may be the tube, suction strainer, check valve, injection point, signal, solution strength, back pressure, or a compatibility problem.
4. Check solution condition, injection path, and contact stage
Solution tank and chemical condition
Record the tank level before and after a known test period. A level that never moves may mean no feed; a level that falls much faster than expected may mean a leak, siphon, incorrect ratio, or control problem. Keep the tank closed as designed and never top it off with an incompatible chemical.
Check the label, age, storage conditions, concentration, and visible condition of the solution. Virginia Tech Extension notes that liquid bleach or sodium hypochlorite degrades over time and should not be stored for long periods before use. The practical implication is not “add more.” It is “confirm what strength is actually in the tank, replace it according to the product and system instructions, and record the change.”
Do not combine old and new chemicals unless the product and system instructions explicitly allow it. Do not add acid, cleaner, fertilizer, or another oxidizer to a chlorine tank. If a chemical was accidentally mixed, leave the area, avoid breathing vapors, and contact emergency services or poison control as appropriate.
External injection-path observations
From a safe position, inspect the visible suction and discharge tubing, fittings, tank strainer, and injection assembly for a loose connection, crystallized deposit, discoloration, leak, or an empty tube. Do not disassemble the injection point or loosen fittings while the line may be pressurized. Compare the installed parts with the pump manual and chemical-resistance information; Stenner lists compatibility as a separate consideration for its wetted components, so do not assume that another pump’s tubing or check valve is interchangeable.
A blocked injection check valve can make a pump appear to run while little or no solution enters the water. A clogged strainer can reduce suction. Deposits can also be created by the water chemistry or by oxidation. Virginia Tech describes physical, biological, and chemical plugging hazards and notes that chlorine can oxidize dissolved iron into precipitates. That means a low residual plus orange or brown material, rising filter pressure, or repeated blockage is a treatment-train problem to diagnose—not a cue to raise the chlorine dose without limits.
Estimate contact time, then identify the design basis
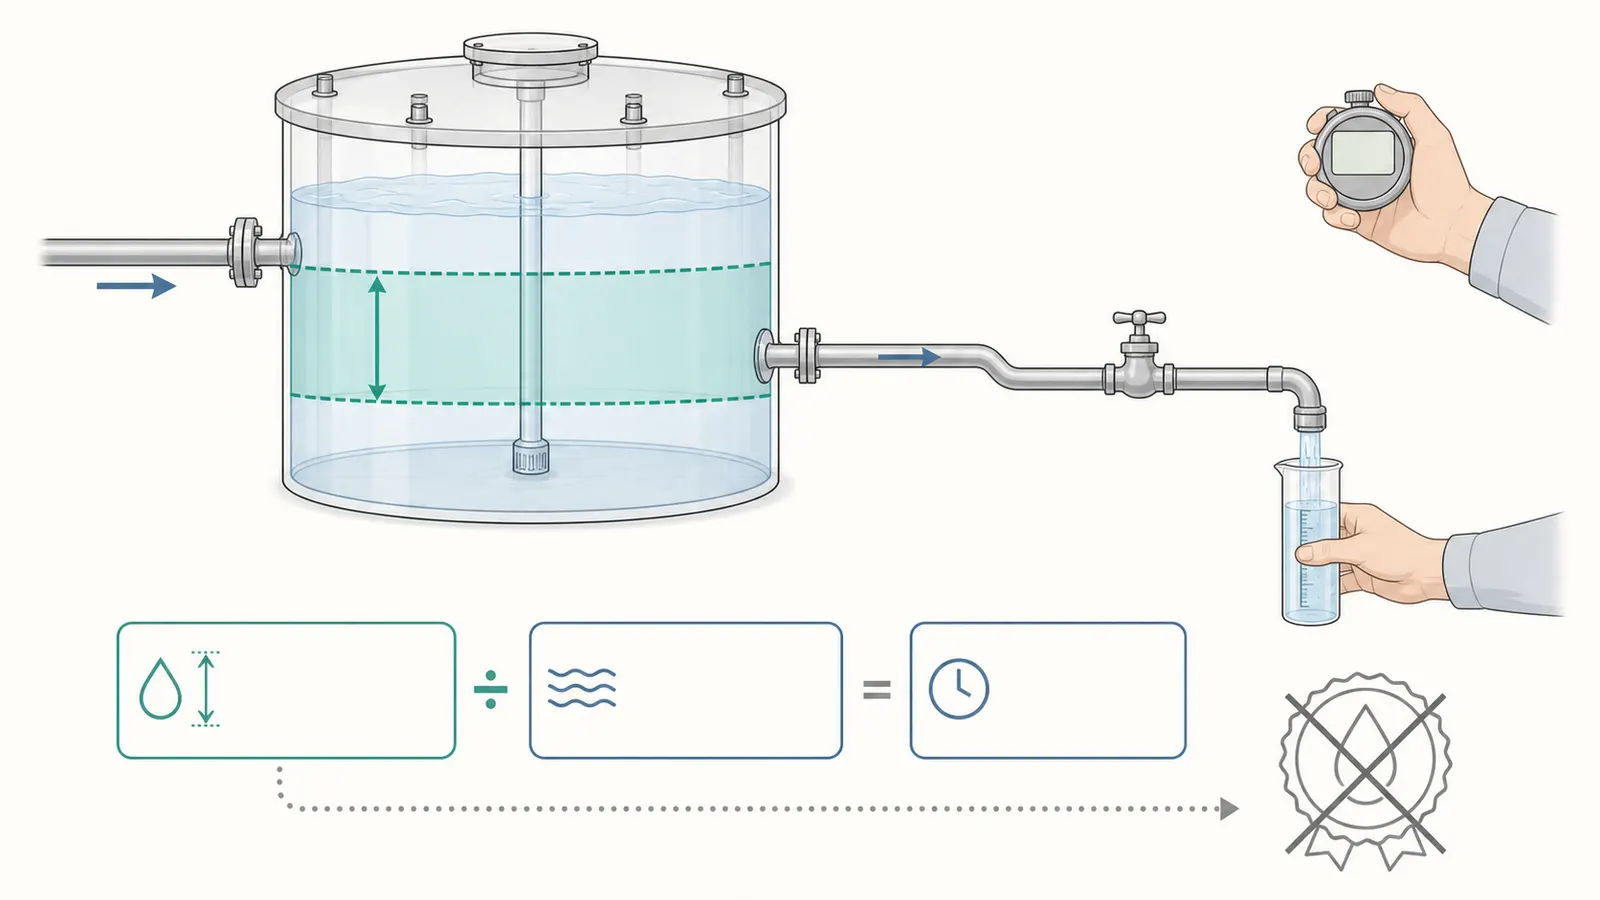
Write down the usable contact volume after the injection point. Include the contact tank’s documented working volume, not its outside dimensions or empty shell volume. If contact piping is used, record the pipe diameter, length, and design flow from the installer or designer. Do not assume a pressure tank provides the required contact time; MU Extension specifically warns that pressure tanks are usually too small to always provide 30 minutes.
As a screening calculation, estimated hydraulic time in minutes = usable contact volume in gallons ÷ flow in gallons per minute. For a documented 100-gallon usable volume and an observed 5 gpm, the arithmetic is 20 minutes. At 10 gpm, it is 10 minutes. Record both the flow condition and the result:
| Contact record | Example | Your system |
|---|---|---|
| Documented usable volume | 100 gal | __________ |
| Observed or design flow | 5 gpm | __________ |
| Volume ÷ flow | 20 min | __________ |
| Approved required contact time | Must come from design/label | __________ |
| Contact stage bypass, mixing, or baffle information | Not assumed | __________ |
This division is a screening estimate, not proof of disinfection. Real tanks can short-circuit, have dead zones, or provide less effective contact than their nominal volume suggests. A target may also be based on a specified peak flow, pH, temperature, chlorine residual, or validated tank configuration. If the design only works at 5 gpm but your home can draw 10 gpm, keep the system within the approved operating condition and call the designer or service professional. Do not change a pressure switch or restrict a line to force the calculation to look better.
5. Take and interpret a free-chlorine residual sample
Use a test kit that explicitly measures free chlorine, not only total chlorine. The Minnesota Department of Health measurement guide specifies a DPD colorimetric method for its regulated program and gives useful quality controls: use unexpired reagent, fill the vial to the specified level, keep the vial clean, and use the correct range and mode. For a private home, this is a good measurement discipline; Minnesota’s reporting and compliance intervals do not automatically apply to you.
Sampling procedure
- Choose the first accessible tap after the final contact stage. If practical, also test the farthest tap in the home and record both locations.
- Close other high-use fixtures. Then run the selected tap long enough to clear stagnant water; use at least one minute as a documented starting practice unless the system instructions specify a different sampling method.
- Sample during a representative or high-use condition if your design target is based on peak flow. Record whether a shower, washer, or other demand was operating.
- Rinse and fill the vial exactly as the kit instructions require. Add the DPD reagent, mix, and read within the specified time and lighting conditions.
- Record the result in mg/L or ppm, the kit type and range, reagent expiration, time, sample point, flow condition, pH if available, and whether the result was below range, in range, or above range.
- Repeat a questionable result with a fresh vial and reagent. If the result is still absent, below target, or outside the kit range, treat the system as unverified and follow the stop-use boundary.
Do not use a test strip result to claim compliance with a regulated program, and do not call a total-chlorine result “free chlorine.” A combined chlorine reading can overstate the disinfecting residual. Do not use chlorine odor as a pass/fail test. EPA-hosted drinking-water guidance states that taste is not a reliable indication of chlorine concentration and recommends field measurement.
Compare without inventing a target
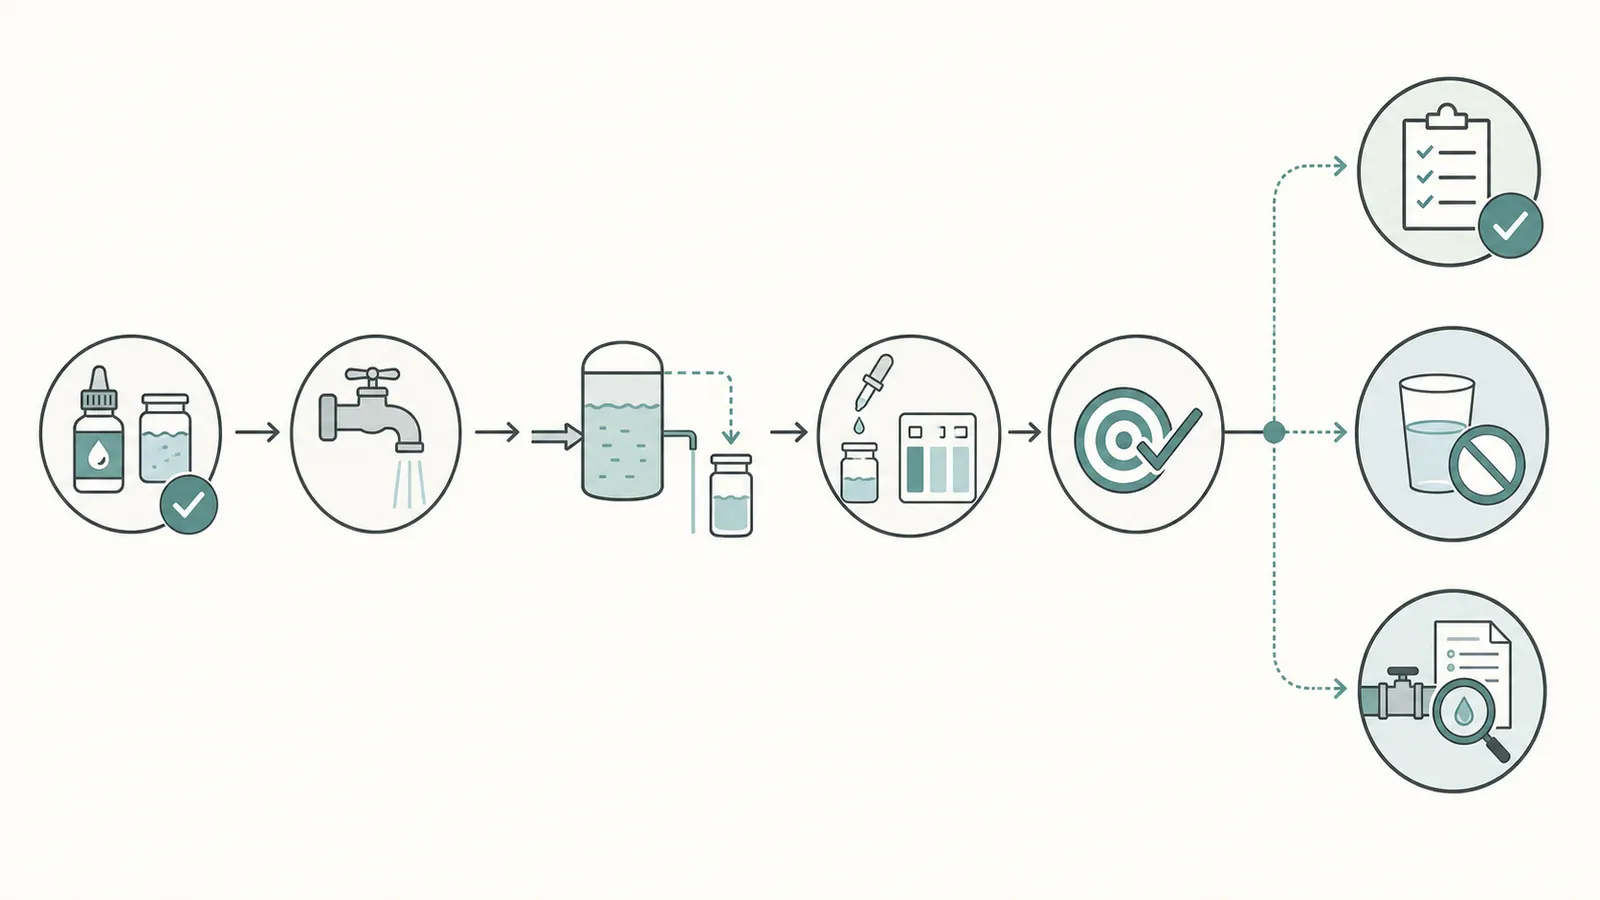
There are three possible comparisons:
- At or above the approved target: record it with the flow, contact, solution, and sampling conditions. This supports “the measured condition met the stated target at this time,” not “the well is permanently safe.” Continue laboratory bacteria testing on the schedule recommended by your health department and system professional.
- Below the approved target or absent: stop drinking and cooking with the water until the cause is corrected and the result is repeated. Do not increase the pump setting until you know whether the failure is feed, solution, injection, contact, or demand.
- No approved target or incompatible test range: the result is not classifiable. Use a safe alternate source and obtain the design record or professional evaluation.
If you have a recent positive bacteria report, a residual result alone does not close that incident. EPA recommends certified drinking-water laboratories for private-well testing, and NJDEP advises post-shock testing rather than assuming that treatment worked. Ask the laboratory or health department which samples, timing, and organisms are appropriate for your case.
6. Use the evidence to separate the failure branches
The most useful diagnostic result is a pattern across measurements. Use the matrix below as a routing tool, not a list of repairs to perform yourself.
| Observed pattern | More likely branch to investigate | What it does not prove | Safest next action |
|---|---|---|---|
| Pump does not respond to flow; tank level unchanged; no residual | Control, signal, power, low-level lockout, or pump failure | It does not prove the well itself is contaminated | Keep water use to a safe alternate source for drinking/cooking; call service with the model and alarm record. |
| Pump runs or pulses, but measured output is zero or far off the record | Worn tube, suction restriction, check valve, air leak, wrong mode, or back-pressure issue | It does not prove that a higher setting will restore the dose | Stop at external observations; use the approved service/calibration procedure or hire a qualified technician. |
| Output is plausible, but tank solution is old, diluted, or unidentified | Loss of active strength or mixing/label problem | It does not prove the pump is miscalibrated | Follow the chemical label and service instructions; replace or verify solution safely, then retest. |
| Pump runs and solution is fresh, but residual disappears after injection | Blocked injection point, check valve issue, chlorine demand, high pH, iron, manganese, sulfide, ammonia, or turbidity | It does not prove contact volume is adequate | Provide water-quality results and sample locations to a treatment professional; do not blindly raise dose. |
| Residual is present just after injection but low at the farthest tap | Contact loss, high demand, long stagnant branch, distribution loss, or sampling error | It does not prove the contact tank’s label volume is its effective volume | Repeat a flushed sample at both points and have contact/distribution conditions evaluated. |
| Residual meets target but bacteria result recurs | Contamination source, well or plumbing integrity problem, sampling issue, inadequate validated process, or a different contaminant | It does not prove the chlorinator is the only problem—or that chlorine protects against every chemical | Stop drinking until health department/lab guidance is received; arrange a sanitary and treatment-system evaluation. |
| Strong chlorine odor but no documented residual or target | Overfeed, recent shock treatment, stagnant water, or a perception caused by chemistry | It does not prove safe disinfection or unsafe water by itself | Test with a valid free-chlorine method and confirm the design target; do not adjust by smell. |
The chlorine-demand branch deserves special care. MU Extension explains that chlorine can be consumed by substances such as iron, manganese, hydrogen sulfide, and ammonia, and that higher pH and cloudy water reduce effectiveness. A feed pump can therefore be working while the post-contact residual is inadequate. The answer is a water-quality and process investigation, not an improvised chemical recipe.
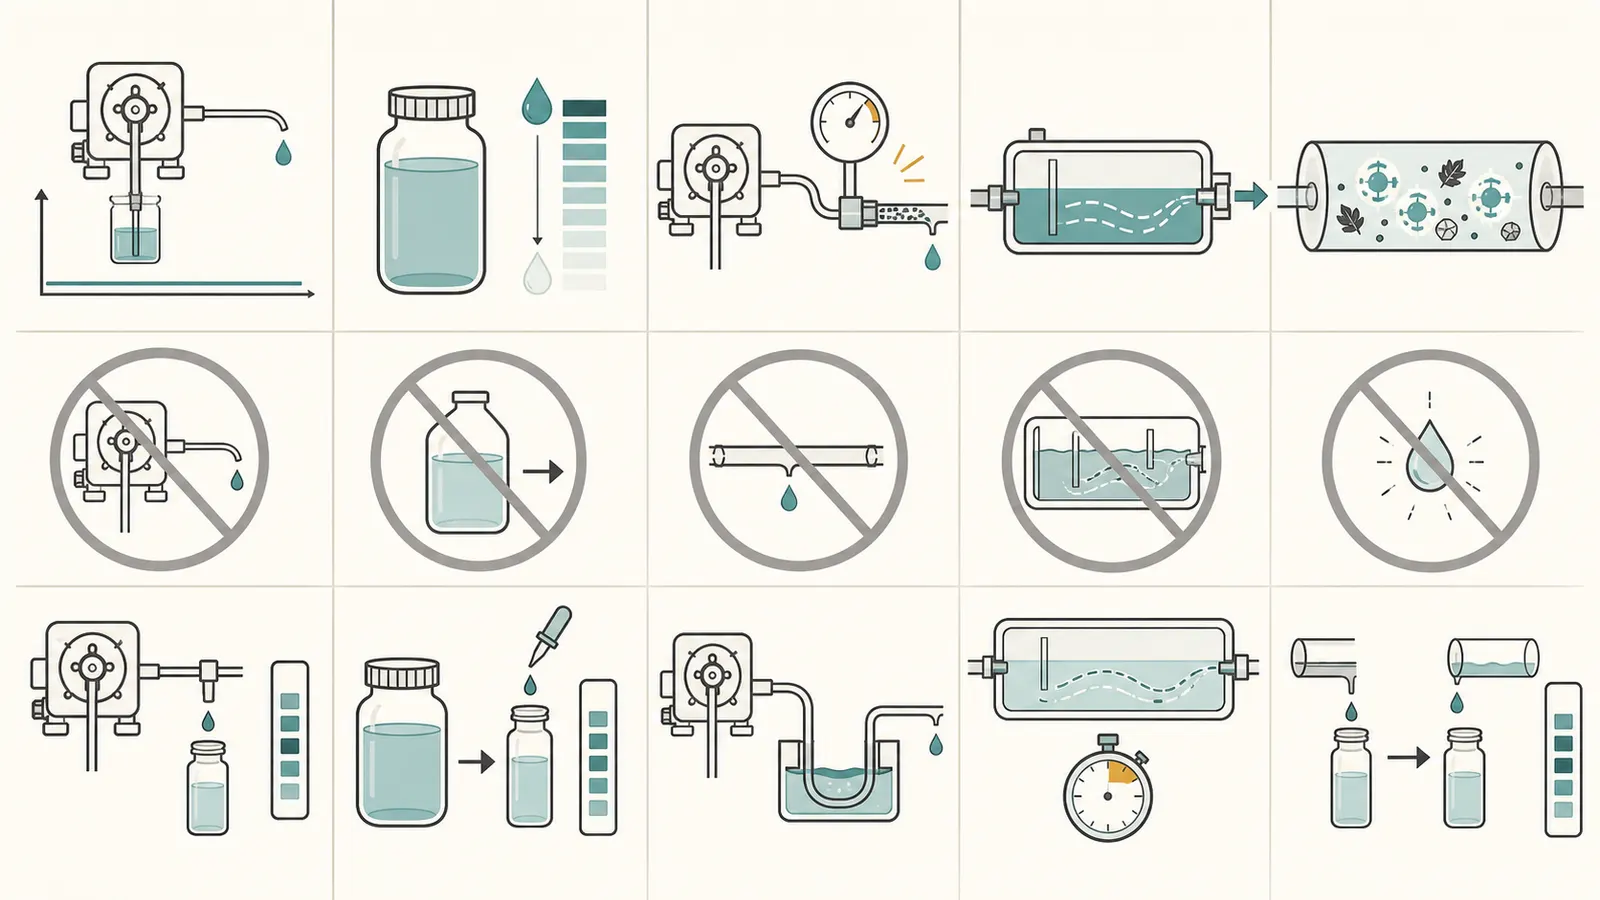
The old-solution branch also deserves a record. A tank that is full is not necessarily a tank with full-strength solution. Virginia Tech’s treatment guidance notes that hypochlorite degrades over time. Record purchase date, storage conditions, dilution, and the product label; give those details to the service professional.
7. Close the loop with laboratory testing and a maintenance record
After a correction, repeat the same evidence chain under the same or deliberately documented operating condition: design target, solution identity and age, water flow, pump response, measured output if permitted, usable contact volume, free residual at the same sample point, and any water-quality changes. A before-and-after pair is much more useful than “the smell went away.”
For a bacteria concern, use a state-certified drinking-water laboratory and follow its sample-container and holding-time instructions. EPA’s private-well guidance recommends annual testing for total coliform bacteria, nitrates, total dissolved solids, and pH, plus additional testing based on local conditions. The exact panel and timing should come from your health department or laboratory, especially after flooding, well work, recurring positive results, or a chemical change.
Create a maintenance interval from the equipment manual and your evidence, not from a generic calendar. At each check, record:
- solution product, concentration, lot or purchase date, tank level, and any refill or dilution;
- pump model, setting, control mode, tube/service-kit age, alarms, and visible leaks;
- measured or professional-confirmed flow and pump output when required;
- filter condition and pressure-drop observation if the equipment provides gauges;
- contact volume, peak-flow basis, and any bypass or plumbing change;
- free-chlorine result, DPD kit and reagent expiry, sample point, flush time, and flow condition;
- laboratory bacteria results and any health-department instruction;
- the person or company who performed the check and the next action.
The printable Continuous Chlorination Verification Log turns those fields into a reusable record. It is a homeowner worksheet, not an official inspection, laboratory report, code document, or certification. Bring a completed copy to the well or water-treatment professional. The most valuable service visit starts with the system’s target, actual flow, actual feed evidence, contact basis, residual result, and the exact point where the record stopped being trustworthy.
Sources and scope
Evidence behind this page
- Guidelines for Testing Well Water
CDC guidance for privately owned wells in the United States; used for the article’s homeowner responsibility and stop-use boundary, not as a system design standard.
- Well Water Safety
CDC emergency and general well-water safety guidance; applied conservatively to an unverified chlorination system and not presented as a state-specific legal order.
- Bacteria in Drinking Water
University of Missouri Extension educational guidance for drinking-water chlorination; used to explain demand and why one pump or odor observation cannot establish performance.
- Bacteria in Drinking Water
A Missouri Extension example and educational target, not a universal US private-well requirement; the article explicitly tells readers to use their approved design target and label.
- Continuous Disinfection of Groundwater / Free Chlorine Residual Measurement Guide
Minnesota Department of Health guidance for noncommunity public water systems; used as a measurement-quality practice, not imported as a private-well legal requirement.
- Guidelines for Drinking-Water Quality
EPA-hosted drinking-water guidance; used for the article’s measurement principle, not as a private-well compliance limit.
- Filtration, Treatment, and Maintenance Considerations for Micro-Irrigation Systems
Virginia Cooperative Extension guidance for micro-irrigation chemical treatment; the article uses the narrow chemical-stability principle and directs homeowners to the product label and service professional for potable-well use.
- Filtration, Treatment, and Maintenance Considerations for Micro-Irrigation Systems
Virginia Cooperative Extension irrigation-system guidance; used only for failure mechanisms and chemical-handling warnings, not as a design specification for a private drinking-water system.
- S128 - Water meter activated | 1:128 injection
Stenner S128 product page; applies only to that product family and is used to show why the homeowner must identify whether their own system is flow-proportional or timed.
- S128 - Water meter activated | 1:128 injection
Stenner manufacturer statement for the S128; used to justify measuring actual pump output instead of trusting a dial, chart, or nominal ratio.
- Well Water Treatment
New Jersey Department of Environmental Protection private-well guidance; state-specific recommendation used as a conservative professional boundary, not a nationwide rule.
- Well Water Treatment
New Jersey Department of Environmental Protection guidance about shock chlorination follow-up; not a universal schedule for every continuous system or state.
- Protect Your Home’s Water
US EPA private-well homeowner guidance; used for laboratory follow-up and annual monitoring context, not as a chlorinator performance specification.